The RAD Dress Finished!

The Rose-Adélaïde Dureux dress is finally finished and I couldn’t be happier with the result! I am incredibly proud to have been able to make a dress based off of a real portrait in a way that is budget friendly! Looking at the finished product, I would never guess that it was made from tablecloths and lined with scrap fabric.

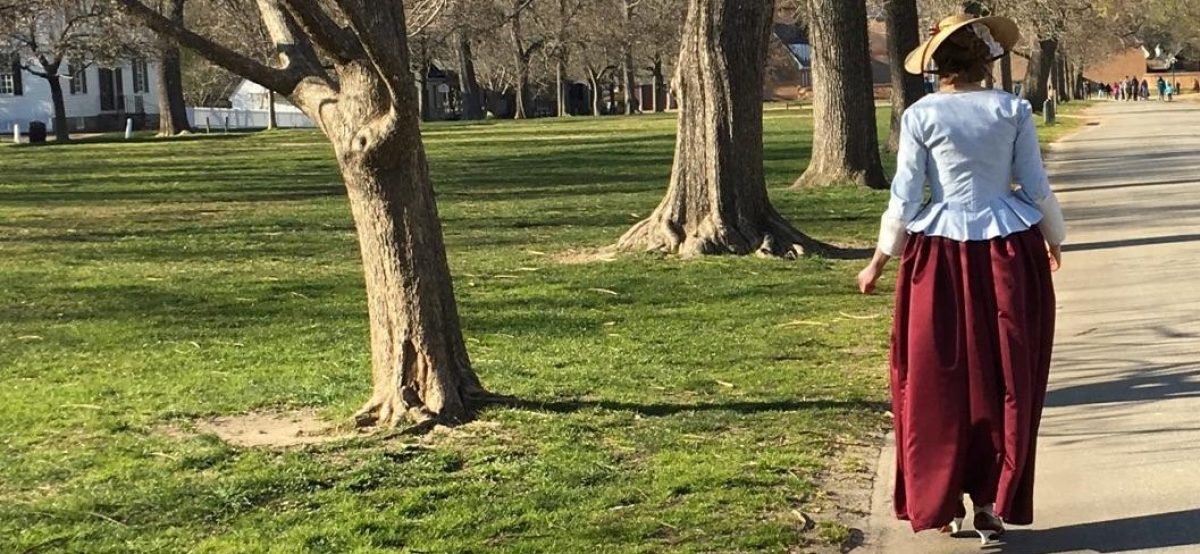
I had some wonderful pictures taken by Katharine Smith Photography (you can find her business on Facebook here!) she is a great friend and does beautiful work! We went to a bed and breakfast called the Wellington Inn that isn’t 18th century (I believe it was built in 1905) but it still provided a beautiful setting to take pictures in. They also made amazing breakfast.

Without further ado, here is the big reveal!

A side-by-side 0f the painting and my version of the dress.

I unfortunately didn’t have any harps to pose with, but I stood next to a piano since it’s another musical instrument.

Me, attempting to be an accomplished lady.

The reason the portrait shows Rose at a harp is because showing that you had musical talent meant you were a well bred, accomplished lady. Keeping with the same spirit, I sat down and showed off my piano skills (which look rather better than they sound).

I also brought a pretty white parasol with me for some of the outdoor photos. It isn’t historically accurate at all, but it pretty and matched the outfit. Many women did use parasols to protect themselves from the sun, they just looked a little different from the one I had on hand.

One of my absolute favorite parts of this dress is the incredible train. It flows so nicely behind me and just made me feel fabulous. It also allows the dress to show off even more of the beautiful striped fabric.

Here is a more close up photo of the fichu I had made the morning of the photo shoot. I am happy with how it turned out and I feel like it really brought the outfit together.

Katharine also got a nice detail shot of the sleeve (or rather, sleeves since the dress is made to have two sleeves per arm) with its pretty lace.

My hair was vaguely historical. I recently got the American Duchess’ Guide to 18th Century Beauty and I did a simpler version of one of their hairstyles from the book. I am still learning how to properly do hair historically and this was one of my first times using pomade and powder. I didn’t want to attempt the hairstyle shown in the painting because 1) my hair is very straight and hates being curled and 2) it looked much too advanced for me at the moment. One day I will conquer it though!

We also did a couple photos without the fichu so I could have some pictures of the top of the dress. The front of the dress is hidden by the fichu in the painting, so it was up to me what I wanted on the front. I choose to do some simple ruffles to give it a little flair.

American Duchess shoes and stockings

I also had to take a nice photo of my American Duchess shoes because these are my favorite shoes ever and they deserved their moment in the spotlight.

Lastly, this was my favorite photo of the day. It shows the beautiful front steps of the Wellington Inn, the amazing train on my dress, and I just felt like a true lady in it.

Stay tuned for more photo shoot posts as I went to the Wellington Inn with three different dresses, so there is more to come!

This project started as just a test to see if I could make something based on an actual historical portrait and ended as a true testament to what you can make with the resources you have. This was by far, one of the most cost efficient gowns I have every made, costing less than it is to buy most modern clothing today. It just proves that a little can go a long way.

Love always,

Victoria
The RAD Dress Fichu

In order to finish up the RAD dress properly I needed one more accessory. You’ll notice in the painting that Rose-Adélaïde is wearing a lovely fichu (A fichu is a little like a shawl. It was used for warmth and/or to protect from getting sunburned and/or fashion).

Rose-Adélaïde Dureux self-portrait with harp from the MET Museum.

When I zoomed in on the fichu I saw that the light fabric appeared to be embroidered and it has a striped border. I couldn’t find materials that matched how her’s looked completely, so I decided to make my own version of it.

I chose to use a plain fabric and I went for a trim that had vertical stripes instead of horizontal. The finished product is clearly inspired by the original but is uniquely mine.

It was a quick and easy project that I was able to whip up the day of the photo shoot I had planned to do with my RAD dress. It is essentially just a square of fabric that needed to be hemmed and have trim added onto. I am very happy with how it turned out and will get the photos of the completed RAD dress out soon!

Love always,

Victoria

RAD Dress: Bodice Progress

The table clothes I am using for the fabric of my RAD dress came in and they are massive! I knew I was ordering table clothes that are 156 inches long, but I didn’t realize how large 156 inches was until I saw it in person. It’s the yardage I need, but folding that much fabric is a pain in the butt. For perspective, I am about 5’10” tall so this fabric is two and a quarter of me tall. It is A LOT of fabric.

If you need lots of yardage of fabric for cheap, buy giant table clothes. They are great.

The color and stripes of the pattern look perfect and I am so excited that I found this. Stripes do mean you have to be extra careful when cutting out your pattern pieces though to ensure that all the stripes are going the direction you want. It sounds fairly easy, but can be quite tricky when you are trying to get stripes to match up at certain seams.

My pretty fabric just waiting to be cut.

I think this pattern took me the longest to cut out of anything I’ve ever made. I legitimately took an entire day to cut this out, taking a few breaks to eat/remain sane. My pattern (McCall’s M7826 by Angela Clayton) has a lot of pattern pieces and I had to change some of the grain lines to make sure my stripes matched up. It involved a lot of thinking in three-dimensions, hence why it took me so long. I also wanted to make sure my pattern pieces mirrored each other with where the stripes were on the fabric. Just lots of thinking, but taking your time at the cutting stage makes sewing much easier later on.

For the lining I used scrap fabric from my fabric bin so I could save some money. Luckily that didn’t have any stripes to match up to I could cut them out kind of any direction I wanted. The lining is mostly linen, but I didn’t have quite enough so there’s also some random cotton in there. No one sees the lining so I really didn’t care if it matched, and historically many women also lined their clothes in scrap fabric so you can sometimes find examples of historical garments with some funky un-matching patterns on the inside. Waste not, want not.

Cutting the lining.

I didn’t start sewing until the next day since it took me so long to cut out everything. The pattern itself is coming together pretty quickly as long as I pay attention to the directions. It’s not an easy pattern, but I wouldn’t call it hard either. It just has a lot of pieces to think about. I only did have to seam rip and resew the seams at the front yoke a few times in order to get the stripes to match up nicely, but it was worth the extra time because now they match up!

Progress shot of the bodice with the lining.
The front of the bodice.

I’m really happy with how it’s turning out and I can’t wait to make the rest of the dress! Next up will be making the sleeves for this then I can move on to the skirt!

Remember, slow and steady wins the race, and makes you a beautiful ballgown too.

Love always,

Victoria

Rose-Adélaïde Ducreux Undergarments: The Split Rump

I cannot wait to make the Rose-Adélaïde Ducreux dress (from now on abbreviated to the RAD dress for the sake of less typing) but before I can begin work on the dress itself, I need to get all the correct undergarments. The portrait was painted in 1791, so I have most of the correct undergarments already.

A reminder of what this beautiful portrait looks like. This is from the MET museum.

Her chemise, corset, and petticoats would be the same as the ones I already have from some of my other 18th century projects, but the support garments would be different. You can see in the portrait that there is more poof is the back of the gown than the front or sides which means she is wearing a bum pad or false rump. And thanks to the American Duchess Guide to 18th Century Sewing book, I know that Italian gowns (which this is) would have had split rumps.

This is a picture of a picture in my American Duchess book of a split rump.

The split rump is split like that so the pretty back panels of a woman’s dress will lay flat against her back while still having the padding in the back to give you the volume in your skirts that was fashionable for the time.

Originally I was thinking maybe I could get away with using the massive bum pad that I already have so I wouldn’t have to make a rump, but the shape was all wrong. It gave me the right look in profile, but it adds bulk to my hips at the side which is wrong for this style of gown.

Good profile…
But wrong from the front.

And so I embarked on making my false rump. The instructions in my American Duchess book were very easy to follow and I just used some scrap materials I had lying around so it came together quite quickly.

Progress shot if the rump.
Stuffing with fabric scraps.

I decided to stuff my rump with some of the small scraps I have precisely for this reason. I was feeling very proud of myself and eco-friendly until I put the rump on. Unfortunately, stuffing with fabric scraps made my rump way too heavy so it wasn’t very comfortable and it was droopy and sad looking which is not what you want in a support garment. Historically, these would have been stuffed with feathers or cork because they are light which means you don’t get a heavy, sad looking rump like the one I made.

Sad rump.

This was an easy fix though and I ended up using poly-fill to finish it up. I didn’t actually take a picture of the finished project but it is much less sad looking now, and much more comfortable. I did take a picture of the sad version with my petticoat on which at least gives you an idea of how the rump works with a skirt on.

Now the undergarments are done and I am ready to move on to this amazing dress! I can’t wait!

Love always,

Victoria

New Project: The Rose-Adélaïde Ducreux Dress

For my summer project I decided I want to recreate the gown worn by Rose-Adélaïde Ducreux in her self portrait with a harp.

Rose-Adélaïde Ducreux Self-Portrait with a Harp

I have loved this portrait for a while and have wanted to make this gown. It was painted in 1791 and she is wearing a beautiful robe a l’anglais/Italian Gown with a cutaway front. The teal stripes are one of my favorite colors so this dress had just been begging me to make it.

Rose-Adélaïde Ducreux was a pretty cool lady. She was a painter and accomplished musician. This specific portrait of her was actually life sized which makes it even more impressive to me. I would love to see it in person one day.

To be clear this gown is called both a robe a l’anglais and an Italian Gown, they mean the same gown but have different names in French and English. I find this very confusing as in french a robe a l’anglais can also mean an English Gown, which is completely different. It’s confusing but it is what it is and Google is very helpful for clearing things up.

An example of a robe a l’anglais similar to the one I want to make. This one is from the MET Museum.

I found the perfect pattern to use through McCall’s. They partnered with Angela Clayton who is an amazing costumer. I love a lot of her work so I’m excited to get to use her pattern!

The last bit of prep to do was finding fabric, which I thought would be easy. I was very wrong. The original dress was most likely a silk taffeta with the stripes woven in. If you zoom in on the portrait you can even see there are smaller stripes within the white/cream stripes. The fabric is really specific and I just couldn’t find it anywhere. I found some striped silks that were close and would have worked great but they were very expensive and I didn’t name this blog History On A Budget for no reason. They were sadly outside of my budget so I needed to get creative.

We all know I love using bed sheets here, so I started looking at silk sheets. Sadly, I didn’t find any that would work but my search for bed sheets lead to what I would use. Tablecloths. That’s right, we have upgraded from bed sheets to tablecloths! I found some satin table cloths that measure 90″x 156″ (2.5 x 4.33 yards) so they will work perfect! I did some math and bought three of them to get the fabric I need.

A tablecloth that will soon be a dress.

The striped one was only $12.79 and the plain white ones for the contrasting portions of the dress was only about $9.00 each. We are making this dress the History On A Budget way!

I can’t wait to start this project! I hope you find some creative solutions to your own fabric needs today. Tablecloths are a good find!

Love always,

Victoria

Design a site like this with WordPress.com
Get started